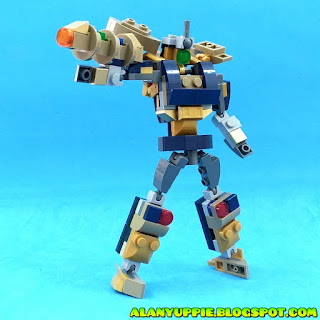
This creation was almost completed in a single day!
PROLOGUE
Not long ago, I published my first Galvatron, made using set 31121 (click here for more info). In that project , I attempted to implement the wheeled/tracked components on the robot arms, but failed, due to lack of hinges.
Few weeks later, I took out my Marvel mech sets , as they were usually generous with joints and hinges, to try and build something new. A few of them are scheduled to have new *creations be made.
*for LEGO Marvel Mech sets, I will try my best to build at least 3 different Transformers from each set (before retiring them).
Well, set 76141: Thanos Mech Armor immediately fits the criteria for my need. The Mech Arm alone with the Infinity Gauntlet contained many hinged elements! So there!
It's been a while since I used the set above to build a Transformer. My first attempt was a Microscope Transformer (below):
Click here video above is not showing.
ABOUT GALVATRON
Galvatron is an upgraded version of Megatron , (the latter was dying , and then reformatted by Unicron to become Galvy in 1986 Transformers Movie),
ABOUT THIS PROJECT
I started this project by building the tracked component onto the robot arm.. and it worked like a charm! This signified a good start, and the rest of the project proceeded with very little hiccups.
The cannon is probably the more challenging part to design. The set provided me with some round parts , but not enough to build to the required length of the cannon. Finally, as you can see above.. they're sandwiched between blocky bricks in an alternating fashion to give an illusion of a corkscrew.
The cannon, powered by infinity stones is far more powerful that the original G1 Galvatron's cannon (making puny connection to a black hole to draw power from)
The tracked component design is connected to the arm, allowed for pretty good flexibility as well.
Here be Reverse-Murphys' Law
I accidentally discovered that the chunky chest-piece was a perfect wraparound for the vehicle mode. This is something I NEVER expected at all at the start of this project. It not just helped to partially conceal the robot head, there are studs on the chest-piece as well to connect the cannon!
TRANSFORM!
ROBOT MODE
MORE POSES
BUILDING INSTRUCTIONS
Building Instructions in the form of a video tutorial , is located at the bottom of this page.
Before you get started, please sort your parts according to the photos below.
Arms
Legs
VIDEO TUTORIAL
Video not showing? Click here please.
Thank you for following my video tutorial!


No comments:
Post a Comment