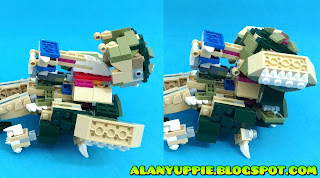
Before I started this project, I was forced to bend a rule that I set for myself when it comes to building LEGO Transformers.
What rule? Well, It's the NO partsforming rule that I always strive to adhere to, where my LEGO creations should transform without reassembly of components*
*Weapons storage in vehicle mode / combiner hands and feet doesn't count
Yeah.. in the past.. I made a few exceptions towards some Transformers (G1 inspired especially) where minimal partsforming is part of their feature (like my Overlord here, where half the jet detached to mount on his arm).
PROLOGUE
I was late in getting set 31121 that was released last year. Upon purchasing the set early this year, the first creation I made with it was Megatron from Transformers: Armada cartoon series (below):
Click here if video above is not showing.
In order to make up for lost time, the creation above was dismantled after a month to make way for new projects. I thought back then... "what's the next creation from set 31121 that will be a worthy successor to the mighty Megatron? ".
ABOUT THIS PROJECT
Galvatron IS an upgraded version of Megatron , (the latter was dying , and then reformatted by Unicron to become Galvy in 1986 Transformers Movie), So I am giving a crack on him this time!
Started early last month, 70% of this project was done over a single weekend.. and things slowed down from there. I felt something was off and needed time to discover what it was and solve it!
I'm not sure what his alternate mode is formally called. A futuristic mobile artillery perhaps?
I was pretty lucky actually. I did not factor in the cannon design when I started this project. There's no rounded bricks for me to use to build the cigar-shaped cannon.
It's simply a miracle I not just able to scrape enough parts to build his cannon, but it's almost in single tone color, and a very distinctive one that is from the rest of his vehicle mode.
TRANSFORM
I deliberately "left" a purple plate on the vehicle front (color code of sorts) , as a guide on where to connect the cannon back on nicely.
The blue parts are the feet that are secured to the vehicle mode by a single stud each. It hurts me to modify the feet to allow this pegging feature, since my initial feet design was pretty nice.
This is yet another reverse-Murphy's law experience I had. Both the handle and the vehicle front were designed independently without considering each other's existence. And surprise surprise! The handle was able to tuck into the vehicle front that was shifted to the back of the robot mode snugly.
The part shown by the yellow arrow will be rotated out to prop up and
strengthen the shoulder joints from sagging .
ROBOT MODE
Yet another incredible coincidence happened while I was sculpting his legs. There's just 2 red tiles from set 31121 (including a spare one) .... and they're perfect as the deco on the knees to mimic Galvatron's cartoon art.
I was unable to connect the 2 vehicle wheelbases to the shoulders like his original toy/cartoon version. So they are hinged separately, becoming robot back kibbles.
MORE ACTION POSES
Set 31121 only have small ball joints for me to peruse. although his articulation is top notch (even the knees are double ball jointed!) , but these small ball joints are pretty weak.
Despite being weak on the knees, the following poses below are possible, obviously... but one must apply great patience to pose and stabilize them!
Initially, I designed the cannon to be mounted on his upper arm (which is still canon* by the way) , but later I shifted it to the forearm.
*pun not intended. I've really seen official arts of Galvatron with cannon on his upper arm.
Begging Unicron for more time to locate the Matrix and destroy it.
"I'm trading my pink cannon for a more dignified orange one!"
BUILDING INSTRUCTIONS
Building Instructions in the form of a video tutorial , is located at the bottom of this page.
Before you get started, please sort your parts according to the photos below.
Arms
Left Leg
Right Leg
Vehicle Components
Pelvis
Body
VIDEO TUTORIAL
Video not showing? Click here please.
Thank you for following my video tutorial!
- More free building instructions using LEGO Creator 31121: Crocodile
- More free building instructions using LEGO Creator sets


No comments:
Post a Comment