


This is my 4th (yes...4TH!) attempt as building Victory Leo using LEGO.
New Here?
If you haven't view part 1 (featuring Jet and Lion mode) , please click here to do so. Done? Let's continue.

ABOUT THIS CREATION
This creation is part of my project Victory 2022 , where I decided to build Victory Saber* after discovering that Hasbro Lab was producing their own version of the same character too.
*Victory Saber is the merging between Victory Leo and Star Saber, the main good guys in TF: Victory Series.

In this part 2, I will feature the transformation from lion to robot mode. Let's go!
TRANSFORM!


Raise the tail up before unfolding the robot legs from lion's body.

Fold the lion legs to form the lower robot legs.

Extend the yellow panels to form a wider back heels.


Raise the shoulder up.
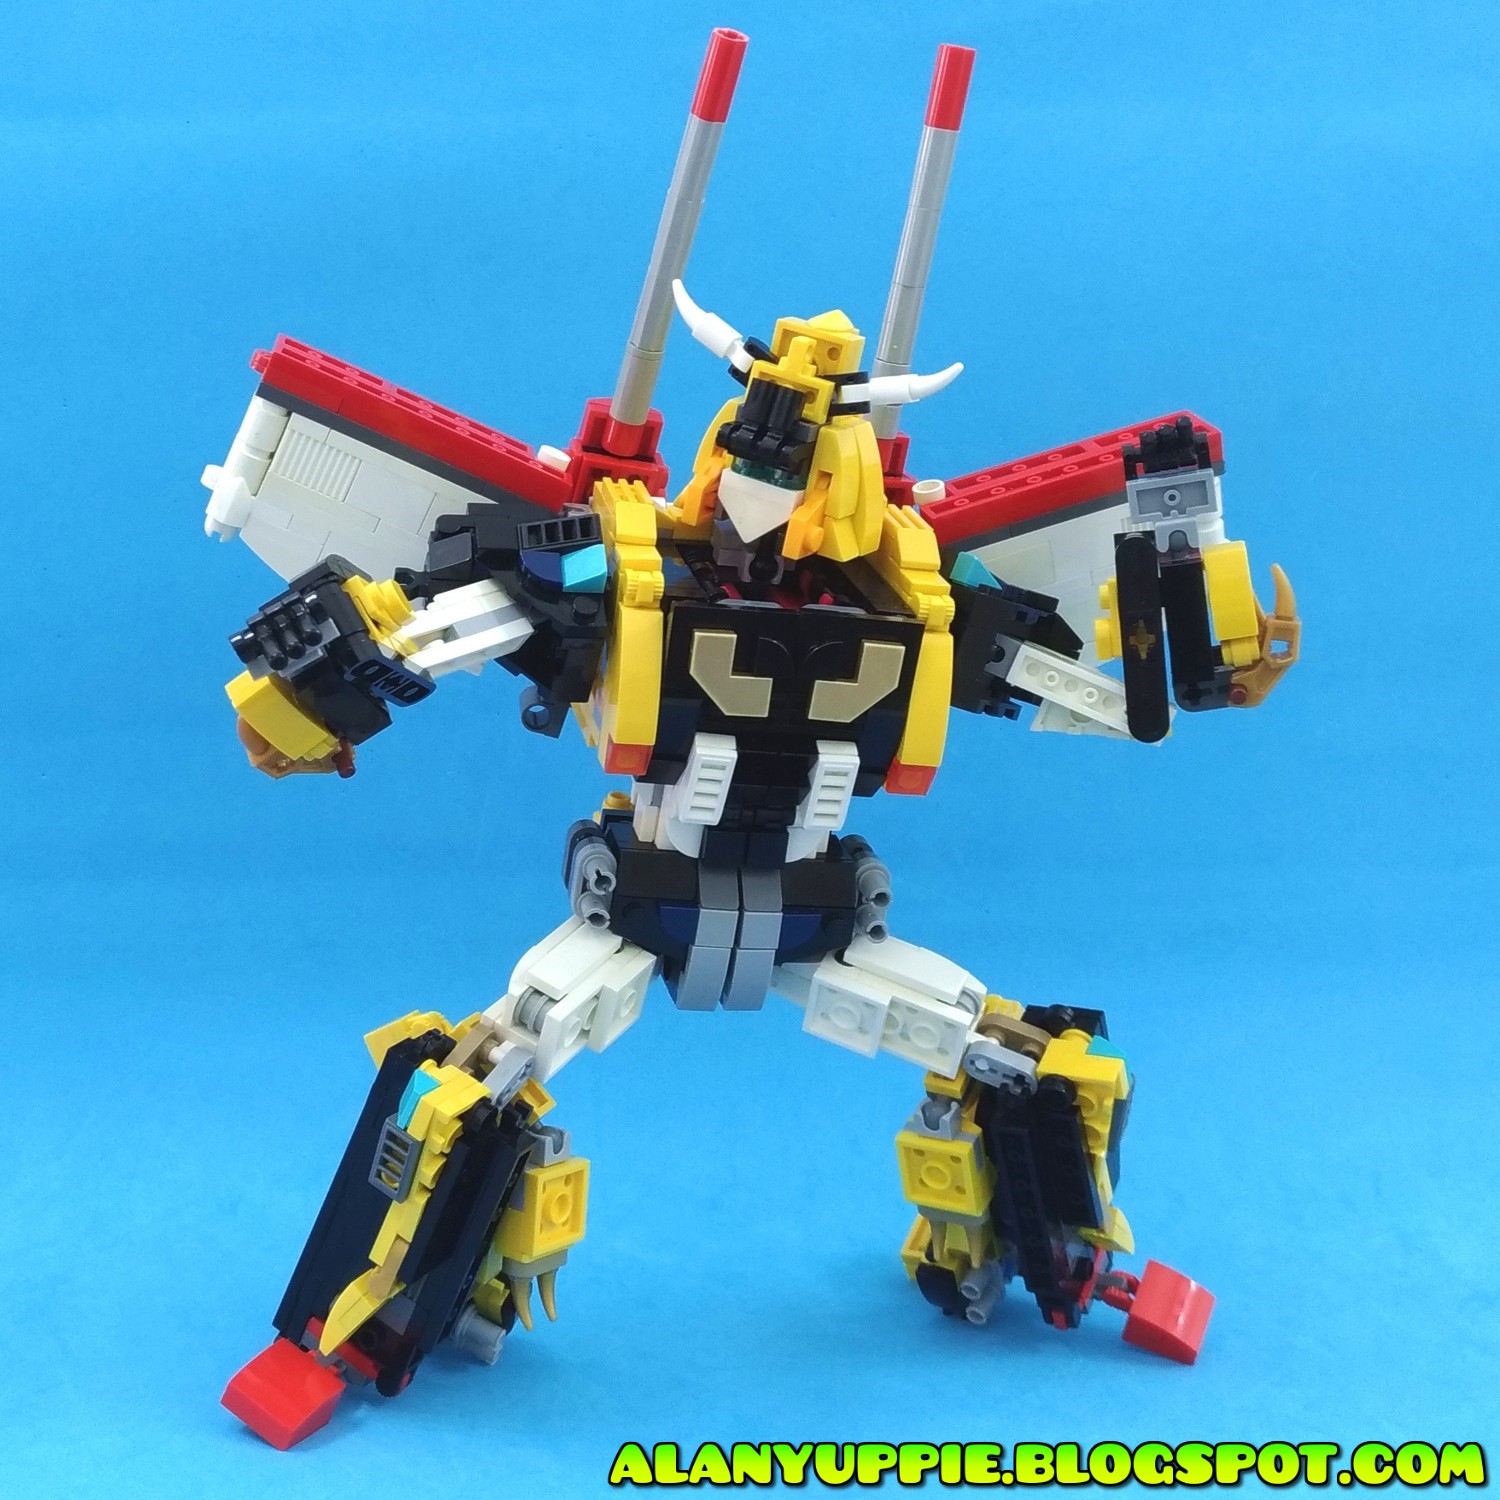
ROBOT MODE
I'm going all out to ensure his robot mode is as close as possible to his cartoon incarnation. However... there are a few pet peeves I choose not to implement. One of them was the big round gatling guns on his waist. After all, I love my bots to be well proportioned with nice silhouettes.
One of the final changes I made a day before I wrapped things up was improving his face. Below is what he almost looked like!

Then a sudden epithany hit me: I remembered the existence of a wedge shaped part that's perfect for a face. So there! Finally he has a more defined, sharper chin.

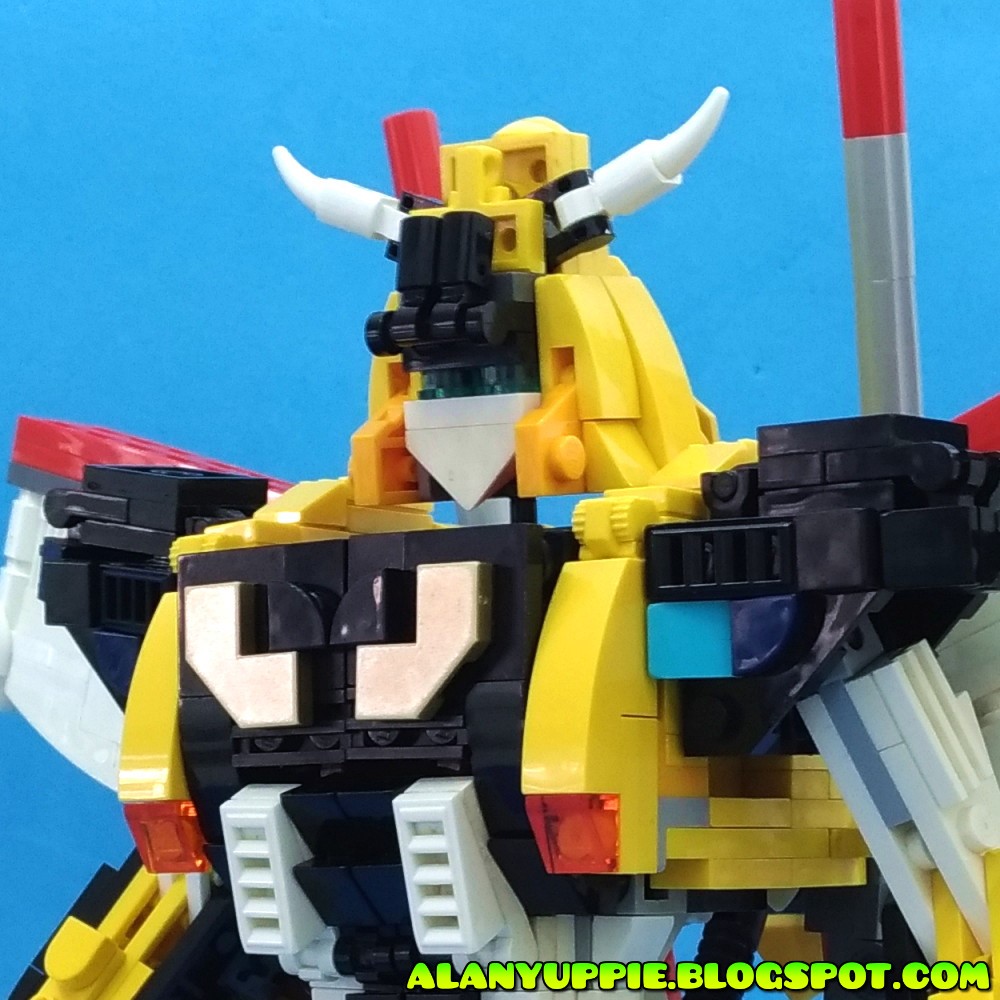

The black hooks on the side of his shoulders are not meant to connect any weapons. They are the connecting points to form panels in jet mode.


Even though I can configure my LEGO Victory Leo's cannons to jut out from his back (like the inset official art of him), I decided (and preferred to) position them lower. Why? I don't have a tall backdrop/background to snap photos of tall figures...!
MORE POSES


Cartoon VicLeo light gray hands was what I aimed for initially, but they were poorly concealed in lion mode. So I decided to make them black (to fllow the official toy). And LEGO officially only offered ball joint sockets in gray tones for me to peruse. So I was unable to make his hands all black either.


ARMED ARMS
Yea I know it's a bad pun. Here's how he is usually shown in the official artworks: with the cannons mounted on both his arms.


I applied a jumper 1x2 plate with 1-stud on top , for the forearm design.... to allow for the cannons to be pegged on.

I realized a single stud connection was not strong enough. Both cannons tend to fell off every time I pose the robot about! Argggh....!!


WITH BIG GUN!


Connection of the gun to his waist is quite a no-brainer! I think I spent half a day modifying the robot waist to accommodate this and end up reverting those changes. In the end, all I needed was a c-clip part + modifying the gun itself . And the gun's black clamps primary purpose to interface with Star Saber's arm, helped to secure the gun to VicLeo as well.


FINALLY, A BIG FREAKIN BOOT...
Initially I planned not to reveal the photos of this mode at all , preferring to save it for another article where both him and Star Saber is finally merging. But I guess a single photo won't hurt :)

However, You guys just have to wait for the final merging of Victory Saber to see the transformation steps to form the boots.
Curious to see how I made this guy?
The outtakes video below will show the various design methods I used while working on this project!
Click here if video above is not showing.
Well, this is not the end. Do pay a visit to my blog a week or two later to see my LEGO Star Saber. Thanks guys !!

No comments:
Post a Comment