


Oh boy... this project has been in limbo for over a year.... a testament to my extreme finicky-ness!
PROLOGUE

However, the set was quickly cancelled soon after , despite being in final stages of production . It was rumored that some of the retailers still able to get hold of the set , though.

So, I set my eyes of this vehicle* and thought.. "this could make a really cool Transformer".. or shall I say... "I SHOULD MAKE a Transformer with this mode".
*By the way, I knew the existence of V-22 Osprey in Transformers live action movies, but it yet to pique my interest. Thinking back, in the midst of the chaotic movie scenes, I failed to grasp the shape of the ospreys featured inside to appreciate them.
ABOUT THIS PROJECT
In the middle of last year (2022)... this project was started. I wondered why it took me so long to initiate this. Perhaps that was the year I seriously started to challenge myself to build Transformers with realistic alternate mode, like this one for example.
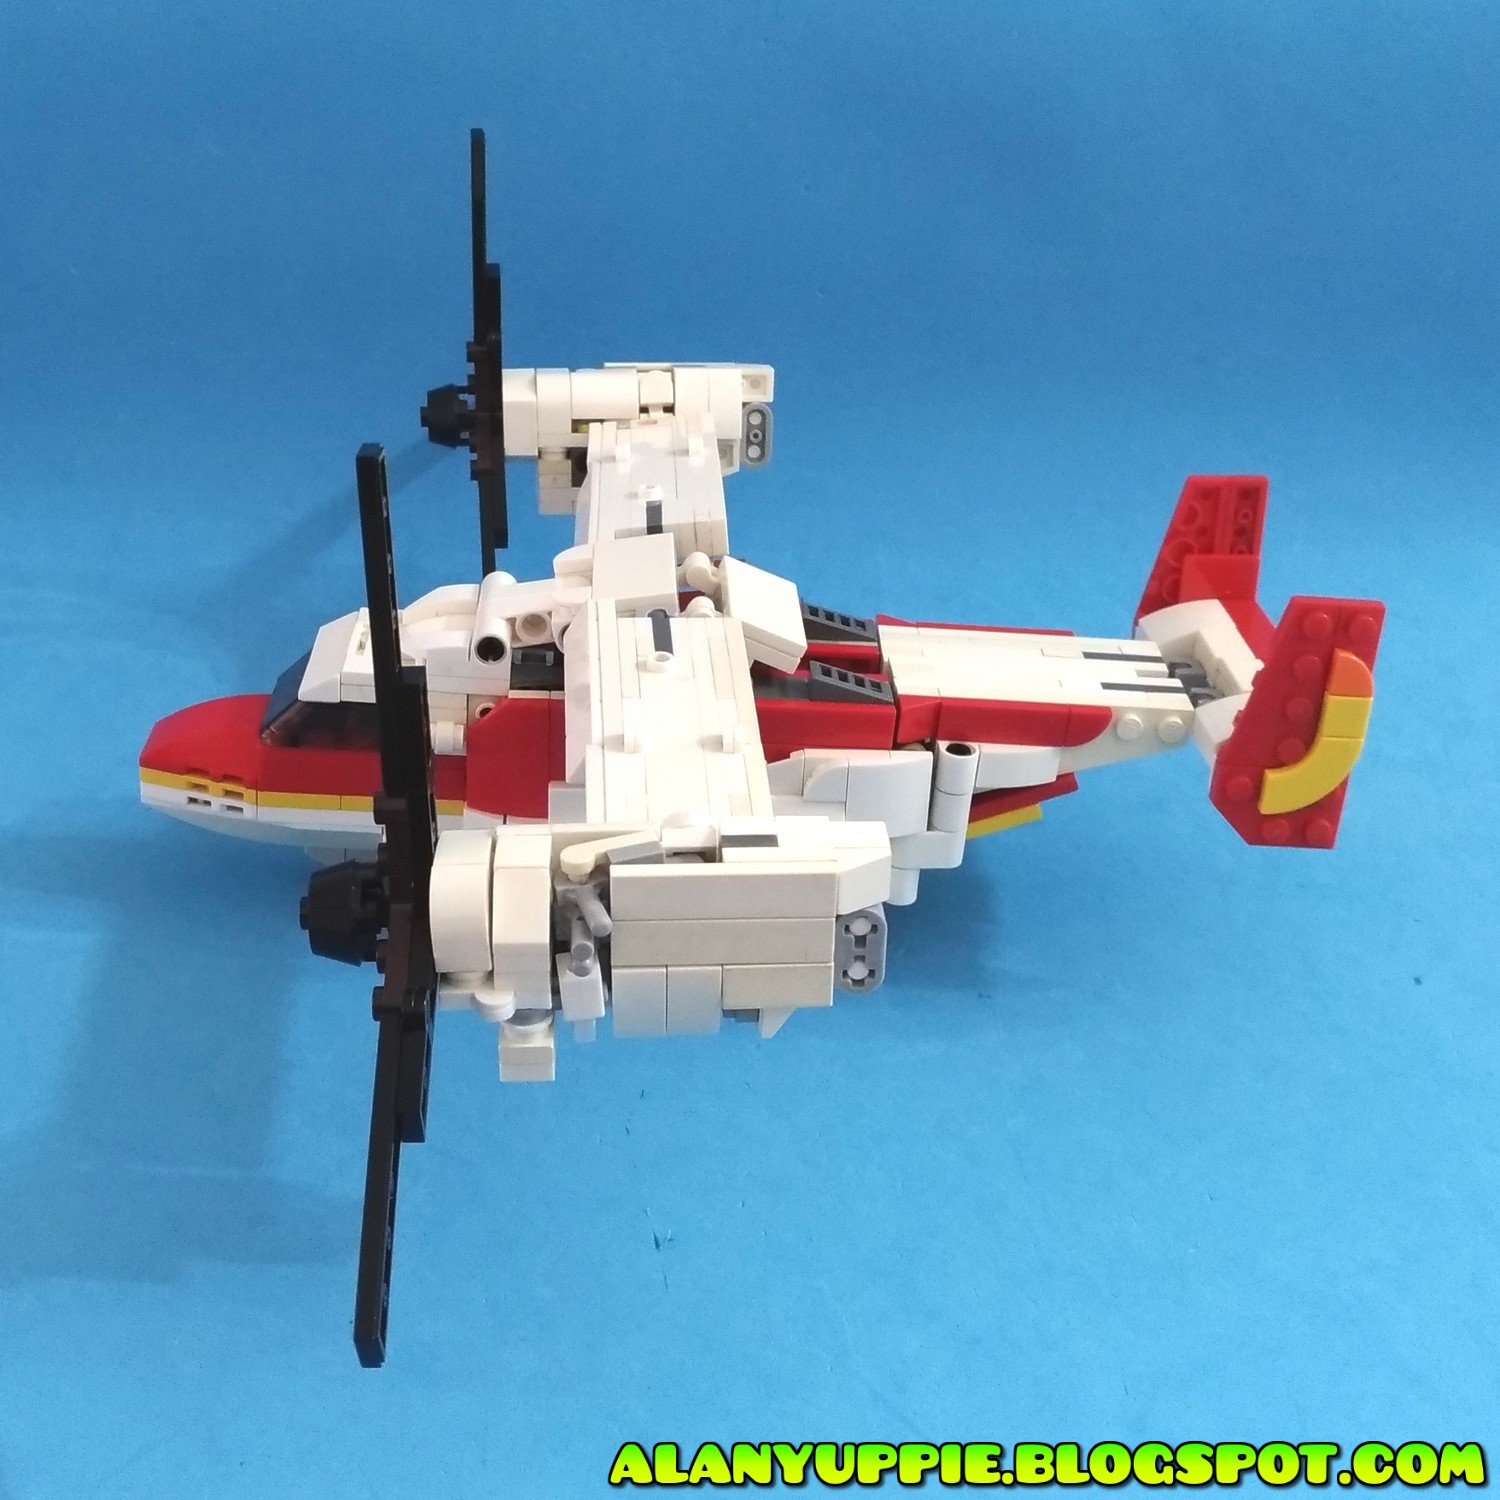
I started by googling image of this vehicle and was shown mostly in boring grayish color scheme, which I am not a fan of. I've decided to color it red and white, to pay homage to one of my favorite LEGO planes of the 1980s/90s (below)

Ground Mode
I think I spent less than a month to complete 95% of this creation. Almost all engineering challenges were tackled within that short period. I am particularly proud of how I managed to get the robot head concealed.

In the next one year or longer, I put this project aside, and occasionally took it out once every few weeks to ponder on what color accent I should apply on the nosecone (initially it was a placeholder blue stripe), or livery on the tail fins, and even the robot feet. This habit of mine repeated for more than a year until recently!

Incoming reverse Murphy's Law: The opening rear platforms feature were accidental! Initially I designed them for transformation purpose. Who knew it's an actual feature in a real life Osprey.

Many of the real life Osprey photos I googled featured very long rotor blades, which I aptly applied using 1x8 black tiles. While prepping up the vehicle mode for photo shoot.. I decided to use shorter, 1x6 tiles instead... so that they won't buckle when parked on the ground.


Observe the "ears" on both sides of the cockpit. They serve an important purpose later on.

Time to Take Flight


Flight Mode


There are some exposed underside of lego plates on the exterior of the engines. If only I could get smooth white inverted tiles to improve upon this.


Yes, these rotor blades spin freely with no friction at all. This makes it a chore to align them both for these photos you see.


Compact Mode

A real life osprey has a compact mode to save space when parked, with the whole wing swung 90 degrees to align with the vehicle body. Below is the best I can do for my LEGO version:


TRANSFORMATION

Transformation was fairly easy actually since I probably done it for 100 times over. Don't be confused by the photos of the following transformation steps below , since I'm not good in capturing the best angles!


The crown jewel of my engineering: Hiding the robot head inside the cockpit!


The ears on the cockpit provided studs for the folded wings to secure and form the upper body.

ROBOT MODE
Phew! I was so relieved the folded rotor blades behaved themselves here by aligning properly and symmetrically on the robot shoulders.


I seldom use printed parts for my creations. However... the one on his chest was applied at the very beginning of this project. There's not much of a choice when it comes to inverted tiles with prints like this.

One of the final enhancement to this project was applying transparent tiles on his abs. The abs was left with exposed studs for most of the project's lifespan due to my finicky-ness.


The tail fins ended up on the back of the robot legs. They provided extra stability to some action poses which you'll see later down this page.

MORE POSES


The knee was bent almost 170 degree not because it's weak, but I think I busted the pelvic joint (again!) from excessively transforming him during the course of this project.


THANKS FOR REACHING THIS FAR!
Most of my LEGO Transformer I made the last 3 years were using official LEGO sets, with building tutorial readily available in my Youtube Channel.
I hope to pick up the pace and make/publish some that are not from sets ( Click here to view 'em). Who knew, one day such creations of mine will become actual products available for purchase online and at retail stores!
An amazing build indeed
ReplyDelete