


If you're new here, check out the official photo gallery/blog post for this LEGO Creation first. Interested to build one ? Let's go!
Credits in preparing this digital instruction goes to Antonio Nasella aka TheMaster . Thank you so much!
If you are up to the challenge, try Challenging Version below, where building instructions are compact, just 10 images worth. Children might require adult supervision, though.
There's a newbie version too, with about thrice as many instruction steps, suitable for beginners. Just keep scrolling down to look for them.
Note: A few required parts were taken from LEGO minifigures in the set.
CHALLENGING VERSION


Done building the components above? Refer to official gallery of this creation to connect them together.
If you're having difficulty following the Challenging Version above, try follow the Newbie Version below.
NEWBIE VERSION
Left Arm


Arm in 2 angles


Shoulder joint in 2 angles
Right Arm


Arm in 2 angles


Body


Pelvis


Completed pelvis shown in few angles.
Chestplate
Orange parts courtesy of Unikitty from this set.


Left Leg


At this point... you are free to apply the tiles in any way you wanted onto the bare leg.

Leg shown in 2 angles
Right Leg


Leg shown in 2 angles
Legs (connecting them all)
The following is the left thigh with knee hinge


The following is the right thigh with knee hinge


Merging the thighs with the rest of the legs.

The 1x3 dark gray plate shown at the middle above was taken from Unikitty figure. This is a part with a few dots printed on it.

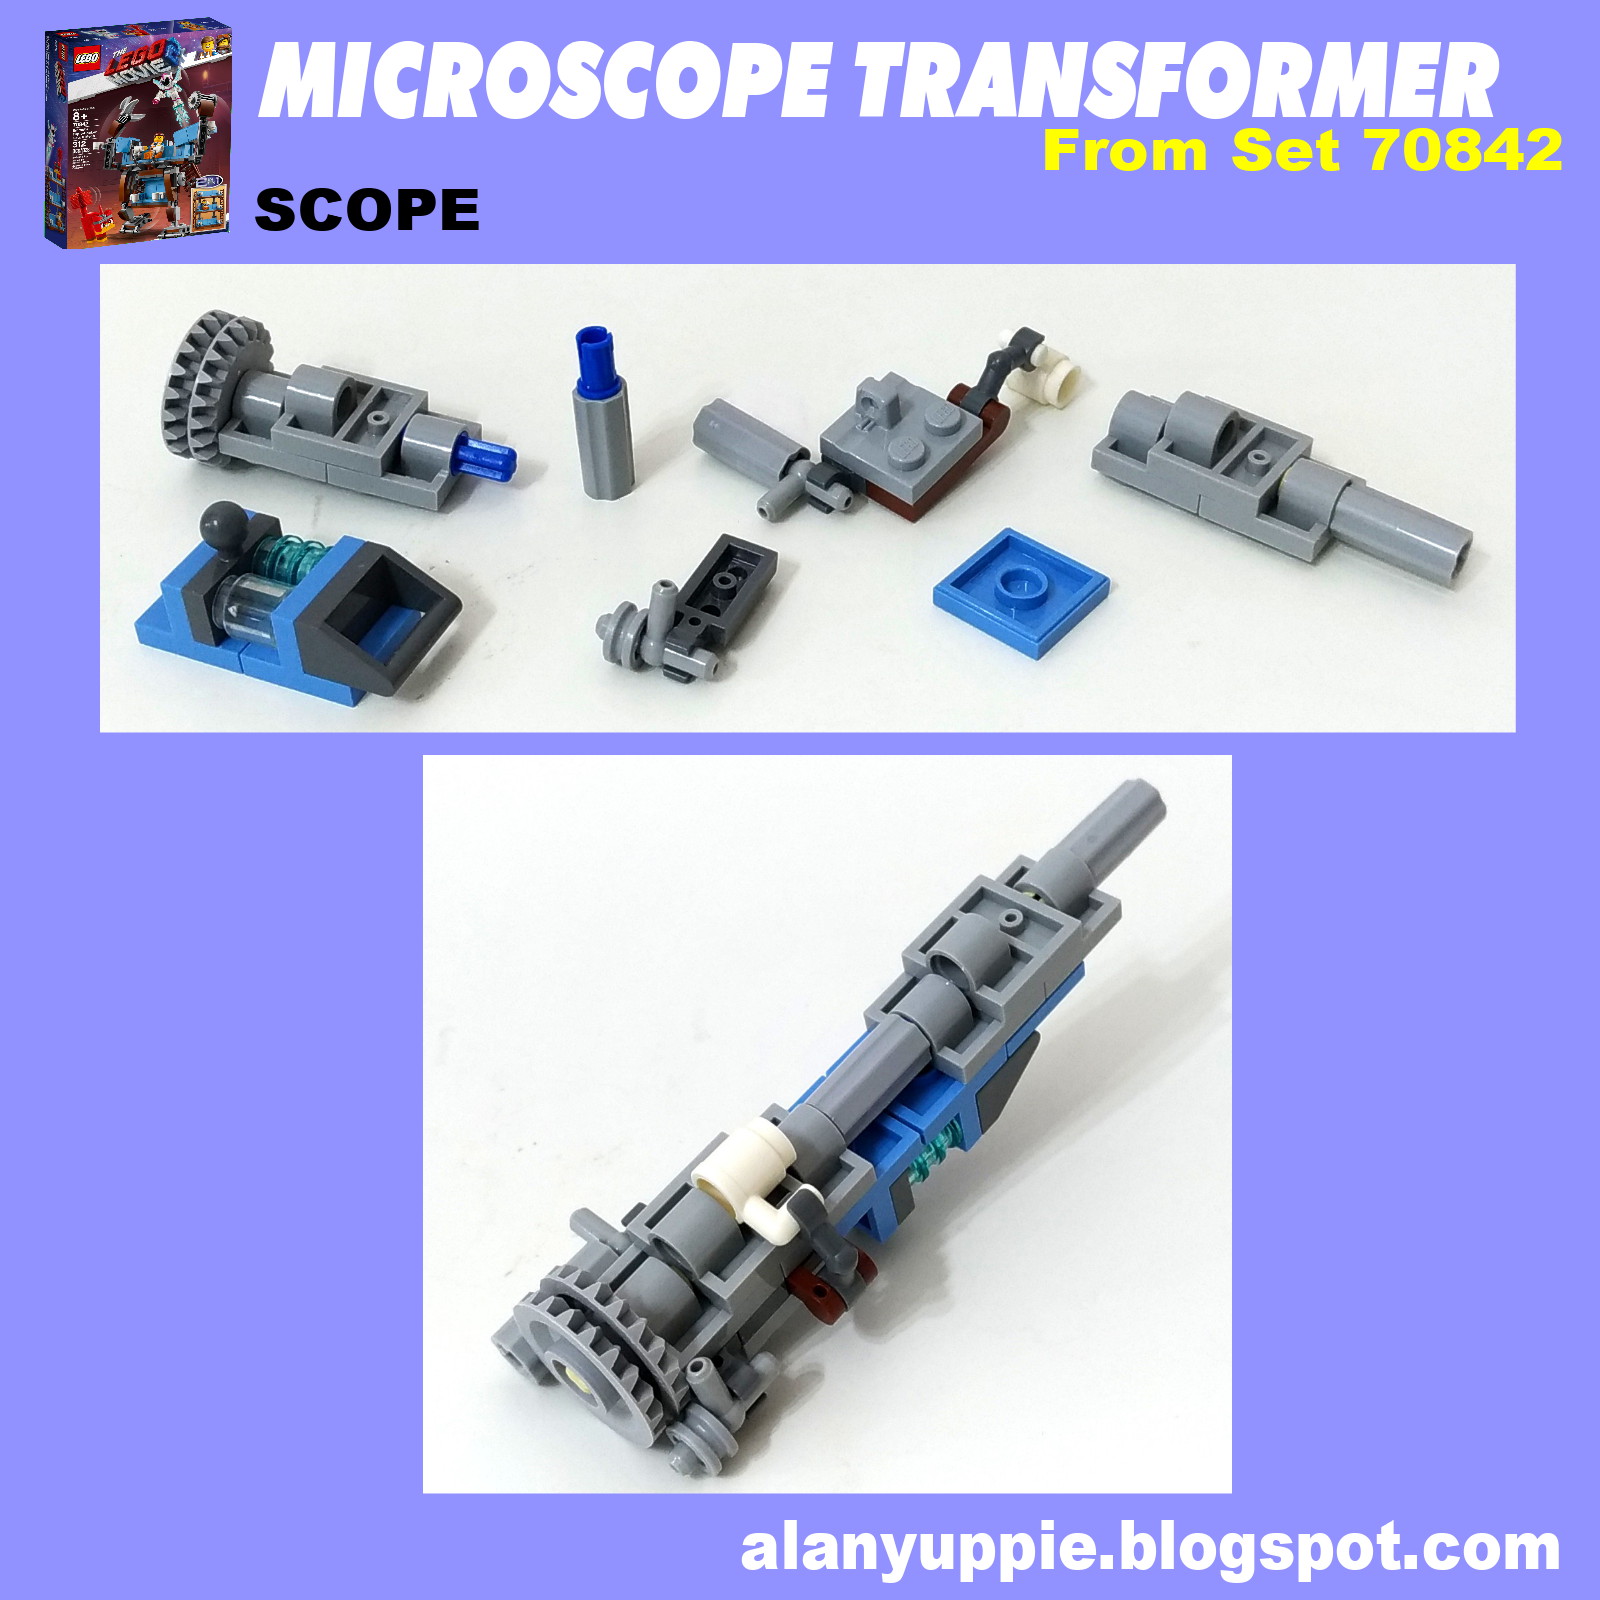
Scope
Note the white mug used for this component


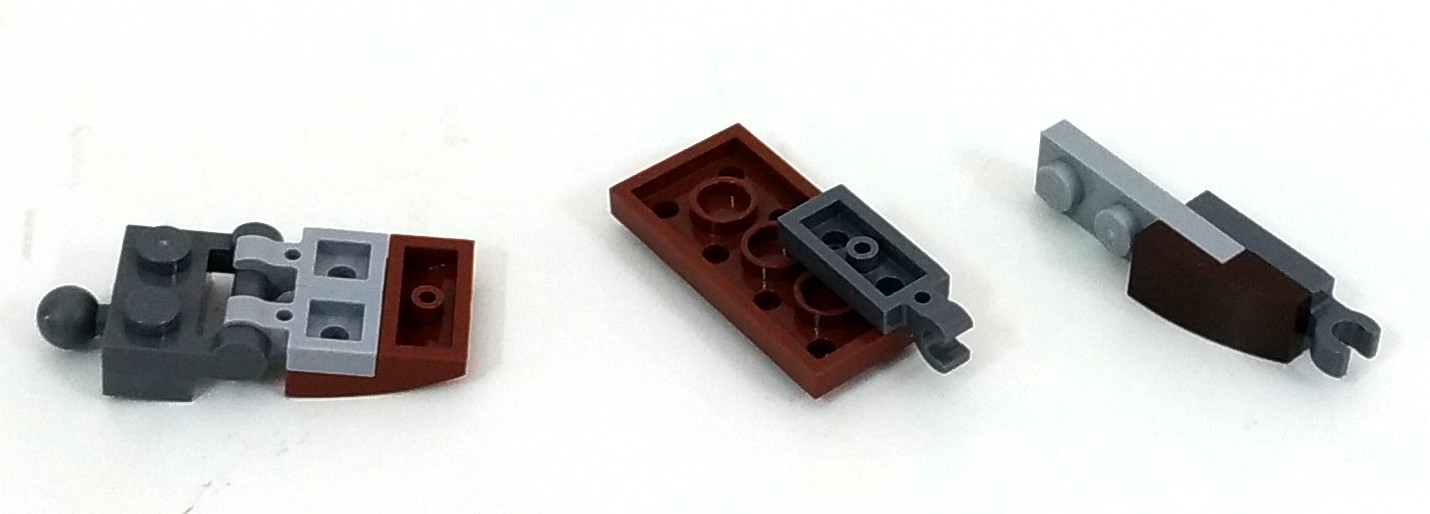
Scope Hinge


Completed hinge should be able to swivel to follow the orientation above.
All Done? Yay...!!
Hope the instructions above are clear and direct . Ready to put them all together? Click here to refer to completed photos of this creation in various angles to assist you.
Waitaminute. Where's the head?
There are just a handful of parts left after building the above components. Your final challenge ..... build the head yourself with those parts. Don't worry.. it'll be very easy!

"Thank you for building me!"
i almost have all the parts to build this guy without the set
ReplyDeleteWhere is the building of the head
ReplyDeleteWhen you're done with the robot body, just a handful of parts left from the set to build the head. It shouldn't be hard to figure this out .
Deleteesta loco lo hice y esta muy lindo
ReplyDelete