


This is my second attempt in trying to build transformable mechs/robots from official LEGO sets (Kai Rotormech being the first). This time around, I'm using two Creator sets , namely 31008 Thunder Wings and 31006 Highway Speedster (below)


Well, initially I thought of building a land vehicle transformer (since both sets offer 8 tyres for me to make use of), but I found out that they're from different sizes and also 2 pairs from Speedster are linked together by axles .. this makes it hard for me to split them up in robot mode (unless I cheated and saw them in two :P)
The number of hinges offered are just right for me to complete the build. I am very pleased to find out that I have excess number of cheese slopes to be used here. But I'm sure is having fun trying to make use of all often to smoothen up various parts of the MOC.
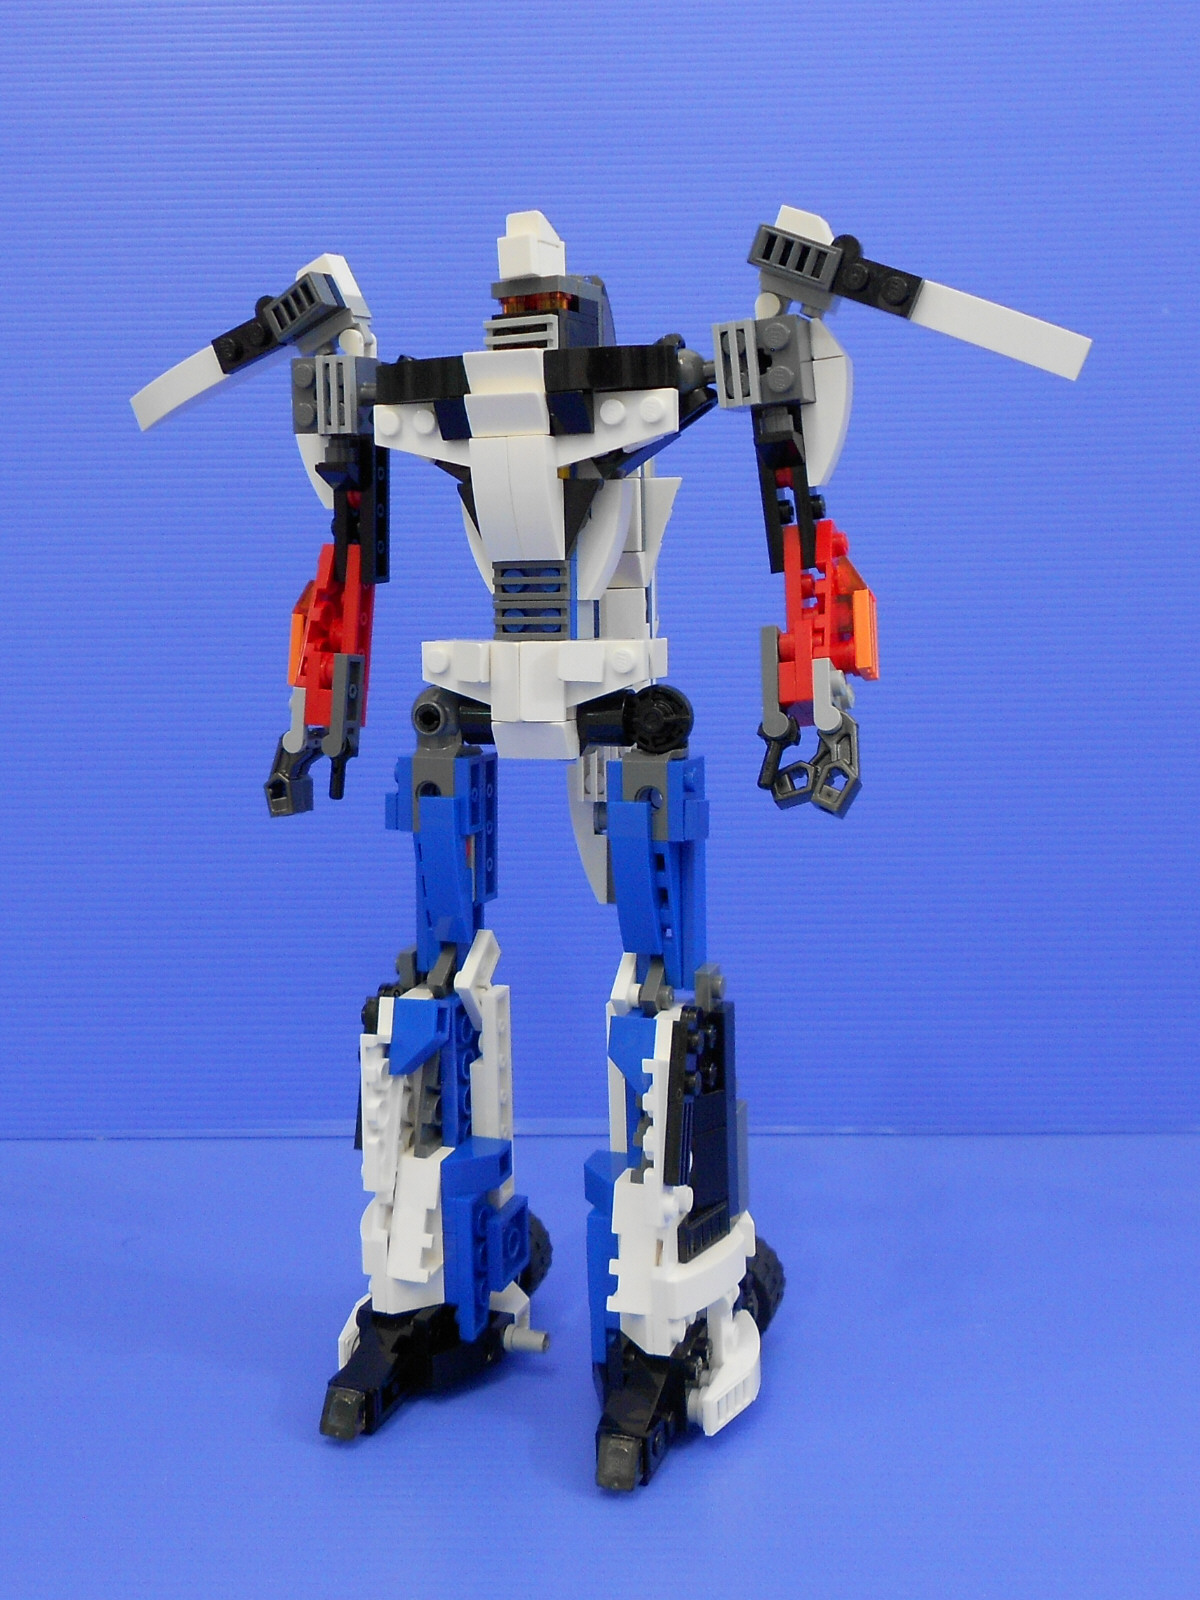
The MOC is very solid in both modes. The arms are tucked nicely at the jet undercarriage and preventing the wings from wobbling.
And when all is done.... I have about 100 parts left over from both sets.
Jet Plane
One of the biggest challenge here is to make the nosecone. First I designed it in such a way that the whole nosecone piece folded to the back . But when it jet mode... it sagged due to the excessive weight and the hinges can't cope. So I have no choice but to distribute a few components that made up the nosecone to the robot shoulder instead (and this cost me 2 hinges).


I was pretty hesistant too at one point to continue on.. seeing how the jet wings are getting more and more thick and unappealing, but they somewhat grew on me. (that's the main issue with Transformers Blitzwing in which I will try and tackle one day).
Transformation Sequence


Robot Mode
The resulting bot mode has excellent articulation... knees, legs,arms,head,waist... you name it! He can do it. However... during the transformation to bot mode... the 4 studs clutching power for each arm on the shoulder ball joint seems doesn't seem to be adequate enough ( it came loose once for each 4 to 5 times I tried to transform him).


Instructions Please!
Yes yes.. I'm hearing you. But since you've just gotten to know about the two sets I combined to make this MOC, I'd think I should give you all one week period to acquire them . Do check my blog again in about a weeks time and I'll put up the instructions for you guys to follow and build.
i don't know if you still read this, seeing that this is an old post, but if you did, can you tell me, if the technic pinthat connect his feet in vehicle mode were removed, how much would it affect the stability of the vehicle mode? i plan to build this, but i don't really like using illegal connection, and the placement of that technic pin unfortunately falls into that category.
ReplyDeleteWell Pukis... I indeed have forgotten about how it goes (and I've dismantled this MOC ages ago). I would say the jet mode will still be fairly stable without that pin . The pin connection simply makes the whole jet more solid. Well.. you can give it a try.. after all its LEGO and you can dismantle 'em if the result is not satisfactory =)
ReplyDeleteGood enough for me. Thanks. :)
ReplyDelete