This project took me more than two years to complete! And a big chunk of those period was spent focusing on some other projects, after a few bouts of builders block where I left this project untouched for many months on end.
PROLOGUE
I always loved trains, but what kept me from building a train Transformer was the bar I set for myself for ages! One of them was insisting the train mode wheels to be compatible with official LEGO train tracks.
Many years ago I finally lowered my expectations, and made a TF train with fake wheels, and he turned into a space shuttle too. He could be my Astrotrain then, but I decided to name him Railrazor instead, knowing one day I will build Astrotrain that stay true to his G1 cartoon/modes.,...a steam locomotive and a space shuttle.
My almost-an-Astrotrain creation above
Another Train-former of mine that turned into a super robot, made in 2019.
Years gone by and a few official releases of Astrotrain by Hasbro surfaced. But this one below in particular hit me right on the head (not literally of course).
Finally, an Astrotrain that looked very similar to his G1 counterpart but with articulations. However, I was saddened to discover that both alternate modes were half baked for a Leader-class toy. Train mode is overdone and bloated while shuttle mode was , for lack of better word, wonky at the rear.
I always assumed the bigger the class (read: more expensive) of the toy, more allowances available to triple changers to leverage and achieve expected alternate modes (more hinges and moving parts) . This official Astrotrain (under War for Cybertron Siege toyline) is definitely NOT the case here.
Well, fine... (big sigh) I'll do it myself then.
ABOUT THIS PROJECT
At very the beginning of project Astrotrain, I aimed to achieve realistic alternate modes of a typical locomotive and space shuttle. As for his robot mode... I hoped to give him a less blocky proportion. A proper waist would do just the trick. Decent articulations is always a necessity, and this demanded a wider footprint.
Below is a short video showing a collection of updates of my project during its first year, some I uploaded in my instagram account periodically back then. (follow my instagram if you haven't already!)
IT'S TIME TO GO LOCO!
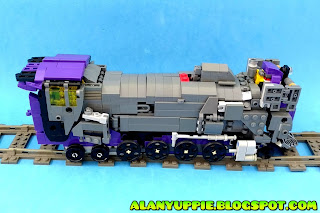
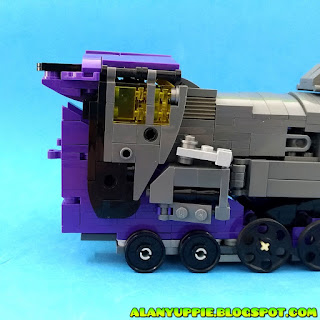
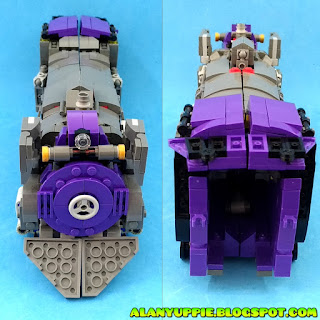
The front part of the train mode was the first to be thought out, where the cowcatcher will form the shuttle tailfin. It was an eureka moment actually.
As I chugged along, I tried to learn more about G1 Astrotrain's locomotive mode inspiration, which was from an actual real world train, JNR Class D50 .
I found great joy in decorating the train exterior to make it more realistic , like pipes and railings running across each side . However, I found myself undoing these designs, due to them interfering with the shuttle/robot mode transformation.
Meet Bob, the train engineer
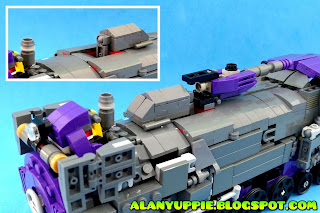
The dome component can be repositioned to make way for the gun/rifle to be attached on top.
The gray piston was initially implemented not just for aesthetic purpose. They were intended to form landing gears for the space shuttle mode . Due to alignment problem in the shuttle mode , this function was deprecated.
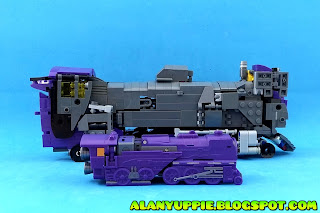
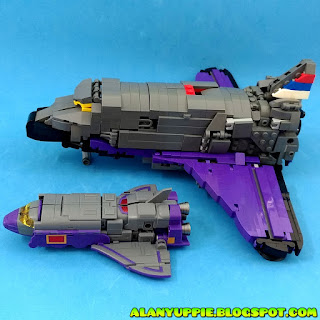
Recently I took interest in 3rd party legend class triple changers. As a start, I purchased Mechanic Studio Astrotrain aka "Steel Ambition" to play around with. Here's a side by side comparison between this mini Astrotrain with LEGO Astrotrain.
TRANSFORMATION TO SPACE SHUTTLE
One of the biggest challenge here is concealing all the train wheels underneath the space shuttle mode. I don't have the luxury of applying "printed" fake/fixed wheels like the original G1 version of Astrotrain. Most of the train wheels in my LEGO Astrotrain are rollable (despite not having a matching railway tracks)
I accidentally left out a black rounded part, one of the propulsion engines (above). Luckily I noticed this early and corrected it before I snap subsequent photos of the shuttle mode.
The yellow arrow indicates the point where wings will be clipped onto the shuttle fuselage.
Above illustrates how train pistons ended underneath the shuttle wings, are no longer fit to become the landing gears as intended. The ideal angle is exactly 90 degree, which is not achievable due to how I connect the wings.
The final landing gears implementation using ball joints however, right in front of those pistons.
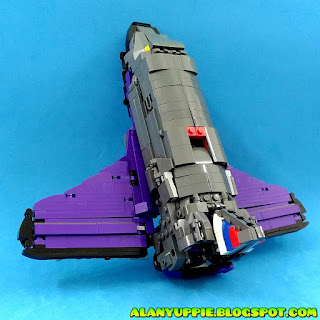
SPACE SHUTTLE MODE
The red squares on top of the shuttle was one of the final enhancements to this project, to allow for the gun be pegged on top of it.
G1 Astrotrain has yellow and red rectangles detailing on both sides of the shuttle mode (passenger entrance?) . I replicated this design at one point, but they stick out like a sore thumb in locomotive mode. So I reverted back to an primarily dark gray facade you see in the final design now.
Transparent yellow windshield would be perfect here but needed part of such color is not officially available yet.
Stripes on the tailfin was inspired by 3rd party Astrotrain named "Thomas" by Fan Toys. Rather than plain gray all they way, these multicolored tailfin looks really great as robot mode chest plates.
One of the bane of my LEGO creations are that they don't have the luxury of being accessorized by me (except for a weapon or two). But I think building a launchpad to complement this one would be a swell idea.
With rifle pegged on top of the shuttle.
Hey! Where did my train go? I'm not certified to work on a space shuttle!
COMPARISON WITH MINI ASTROTRAIN SHUTTLE













That’s actually very nice, worth the time and effort I guess
ReplyDeleteIt looks so good! Is there also an instruction or something else I could use to build one too?
ReplyDelete