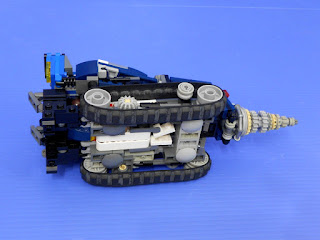
Drillhorn s a member of Breastforce, a combiner team from Transformers: Victory Series.
Introduction
Drillhorn transform into a drill and and form the right leg of Liokaiser. He comes with his minion Hornbreast, a robotic Rhino transforming into his weapon as well.
Video
Click here if video is not showing.
Trivia
- The orange-yellow windshield was meant to be a placeholder piece as I initially planned to find a translucent part for this MOC. But it looked darn good matching with the blue color scheme of this MOC,so I decided to keep it that way.
- Initially I plan to "remold" this MOC to build KillBison (which I revealed 4 weeks ago) too but changed my mind since both their vehicle modes are shaped differently (Drillhorn looks more chubby compared to Killbison, a Gepard tank.)
- The robot head was build to fit in the tiny space in the cockpit/windshield but it's flat (and doesn't reflect Drillhorn's character at all!). So I rebuilt the cockpit to accomodate a bigger head (now redesigned with horns on top).
Although original Drillhorn tank mode is not weaponized , I implement the pop up cannons out of necessity for the sake of the robot mode. (keep reading to find out why)
The drill(bit) is rotatable!
Hornbreast has a secret alternate mode... anteater!!!
The pop up cannons has connection pegs to interface with Hornbreast as weapon.
With KillBison
KillBison forms the left leg of Liokaiser while Drillhorn forms the right.
Breastforce head-to-head comparison.
Transform to Robot Mode
Unhook the arms from the vehicle's back. Notice how the fingers are latched onto the small hole .
Fold the drill up temporarily
Fold out the legs.
The hinges involved in the folding are loose ones. They are located on the robot thighs, so there will be 2 flaps on the back of the thighs to secure their formation (preventing thigh halves from dangling).
Now standing up, the vehicle cockpit is folded to the back , revealing the head. The vehicle cannons now are tucked in to fill up the space above the pelvis balljoints to pad up the emptiness there.
The arm part looks complicated but actually it's not. There are just alot of hinges involved to help tuck in the vehicle flaps on top of the robot shoulder,
Robot mode photo gallery will come in about 2 days time. Do pay this blog as visit again!


No comments:
Post a Comment