I got a strong feeling this project will be my most favorite one for year 2023!
PROLOGUE
After publishing my 2nd Transformer (below) made with set 31129: Majestic Tiger early this year, I found myself yet again too vested with it. This is actually a bad thing for me.. since I couldn't easily move on and build something else with the said set! And I gotta move on somehow since this particular set is a holy grail: It provided me with many parts ideal for dozens of potential Transformers to be made.
So, after lingering on the shelf for more than half a year.... I decided to dismantle Trypticon above, and off I go on yet again another new journey with this Majestic Tiger set!
ABOUT THIS PROJECT
I was inspired to start this project after noticing that set 31129 has a lot of white claw parts. Seeing these parts, my thought immediately went to G1 Snarl , my favorite Dinobot of all! (below).
I had the original G1 Snarl toy which was a hand-me-down from my cousin who outgrew his toy 30 years ago. Sadly, I didn't took care of him (Snarl, not my cousin) and he's in shambles now. My last memory of this toy was one of the hind leg popped off the socket exposing the spring inside, and that was 20 years ago!
Compared with official Leader class Snarl recently released (inset photo) .
90% of this project was completed over a weekend, a month ago, which is incredible considering the size and parts I am given to build it. Usually the more parts I have access to (from one set), the longer time I spent on the project, refining it over and over again.
The tail was the final enhancements before I wrap this project up. Earlier design suffered from clearance issue, preventing the tail from being lowered to near-ground level.
In the original Snarl, his dino head split in to 2 halves when forming robot mode . I tried to replicate that but failed.
I tried to implement hinged jaws as well, but this made his dino head looked really wacky. To make up for lack of jaw , he has neck articulation instead , a feature not available in his G1 toy version.
TRANSFORM!
No, he's not taking flight ..!
Probably my most favorite design mechanism for this project: Securing the dino mode via tabbed spike hinges. Let's untab them to form robot mode.
Unravel the feet from inside the dino body. Tuck in the dino front legs to the newly formed robot ankles.
The final steps will be rotating the waist and also arms are very straightforward and direct, so they won't be shown here.
ROBOT MODE
His head is the crowning glory of my project here. Very seldom I am able to build a head that looked this good and almost resemble the character/toy I take inspiration from.
Sorry for the butt-head!
Opps... I've forgotten to build him a gun/sword! With so many leftover parts from the set, I'm sure you guys can make a weapon for him to use.
MORE POSES
The " knee joint building technique (L-plates sandwiching) used to be my favorite method since the beginning of my LEGO Transformer building journey 20 years ago. Back then, that's one of the few methods to get 180-degree range for transformation need.
I am slowly phasing out this knee joint design in my current LEGO Transformers in favor of proper hinges and ball joints. You will still see this method in my LEGO alternative build projects though , like this project.
For poses requiring 90-degree knee bending, the dino feet position can shifted to stabilize him, preventing him from toppling over.
BUILDING INSTRUCTIONS
Building Instructions in the form of a video tutorial , is located at the bottom of this page.
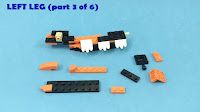
Left Leg
Right Leg
Dino Tail
Back
Body
Others
VIDEO TUTORIAL
Video not showing? Click here please
Thank you for following my video tutorial!
- More free building instructions using LEGO Creator sets


No comments:
Post a Comment